This article was contributed by Robert McDonald, buyer/product specialist, Stainless Hose Fittings, Inc.
Once you have determined the hose and crimp fitting follow these next steps:
Step 1. Measure and cut the hose
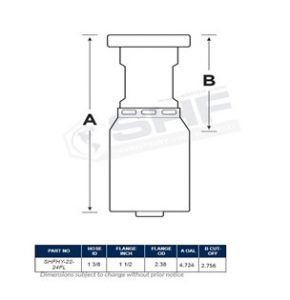
Measure the length of the hose that you need and cut it to the necessary size with a hose saw. If a cut-off length for the fitting is available, use the cut-off length for each side of the assembly and subtract it from the overall length of the hose assembly. If cut-off length is not available, the following can be done to ensure proper hose length.
Place hose on measuring table at the desired overall length. Mark the fitting where the cut length should be if not designated on the fitting. Run the hose along the measuring table then place other fitting at the beginning of the measuring table and place hose against the fitting. Once the hose is lined up correctly with the cut length of the fitting, mark your cut line on the hose.
B= CUT OFF LENGTH
Step 2. Mark insertion depth
Marking insertion is very important to make sure the fitting has been inserted correctly. Determine insertion depth of the fitting by utilizing a hose insertion depth block. This mark will indicate when the crimp fitting is properly seated on the hose. If you do not have an insertion block available, you can determine insertion depth by subtracting the cut off from the overall length or by lining the fitting up against the hose and then marking the hose. Once you insert the fitting, the ferrule should meet the line marked on the hose.
Step 3. Clean the hose
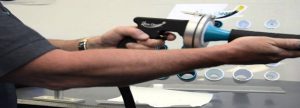
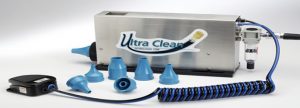
Use a foam projectile to get out all the debris that might have accumulated during the hose cutting (known as pigging the hose). Cleaning the hose will reduce contamination and hose assembly failure. If you do not have the pigging equipment, blowing air through the hose will help, as well.
Step 4: Load the correct specifications and proper die
If you have a programable crimper, load the specific crimp spec called out for the hose and crimp fitting you are assembling. Pick out the correct crimp die specified for your hose and crimp fitting. Doublecheck data before crimping.
SAMPLE CRIMP CHART

Step 5: Place the hose in the crimping machine
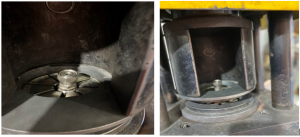
Push the end of the hose into the crimping machine and through the die so that the hydraulic hose fitting appears above the die. The top of the hose, now concealed inside the fitting, should not be above the die. Most fittings are full crimp fittings but there are some that have a specific crimp length designated for that particular fitting. In some cases, they are called bubble crimp fittings.
Step 6: Crimp the hose
Your hydraulic hose is now ready to begin crimping. Turn on the machine. The cylinder head will slowly move down. As it pushes the collar, the collar compresses the die. Do not touch the machine until the collar is firmly at the bottom of the die. The machine should then stop.
Step 7: Verify the crimp diameter is correct
Make sure the hose is finished to the correct crimp diameter by checking the chalk mark that you made on the hose. If it is no longer at the base of the fitting, it means the hose or the fitting moved during the crimping process. However tight it may seem, this is not a good crimp. Otherwise, if the chalk mark is in place, you have successfully crimped the ends of the hydraulic hose. Then check the diameter with calipers measuring on the flats of the crimp to see if your finished crimped outside diameter matches the one called out for your specific hose and fitting.
Step 8: Cap and tag the hose assembly
After you clean the hose again, it is a good idea to cap the assembly on both ends. You can use plastic caps or heat shrink caps. Tag the hose if requested by the client.
It’s that simple, yet it needs to be done right to ensure the safety of personnel working near the hose and the reliability of the system. A reliable crimp will avoid costly damage and downtime resulting from a failure.
Still have questions about how to crimp a hydraulic hose assembly?
Contact OmegaOne to speak with a helpful expert today!


